It has been a tradition in our family, for the past several years, to hang new prayer flags in our yard on the first really nice day of spring. The flags add color to our garden but more importantly give us an opportunity to discuss our hopes and dreams and connect us to others in the world.
Peace Flags were inspired by the Prayer Flags of Tibet. According to ancient tradition, the prayers printed on the flags are carried on the wind. The traditional flags are blue (for sky), white (for air or clouds), red (for fire), green (for water) and yellow (for earth).


Our oldest set of flags were severely tattered from the elements (a reminder to Buddhists that nothing is permanent) and needed to be taken down and replaced. Since they are not to be thrown away in the garbage, we burned them "so that their ashes might be scattered into the wind, and in doing so they will be returned to the earth in order that their blessings might be carried further." (see source here)

A month or so ago, I came across a local organization called
The Peace Flag Project. Their goal is to foster "peaceful relations on all levels." One of the ways they do this is by providing opportunities for people to share their deepest wishes with the world by making their own peace flags.

This is an easy project and great to do with kids. Here is what you need and how to do it:
5 or more torn squares of fabric
markers or fabric paint
3-4' of twine
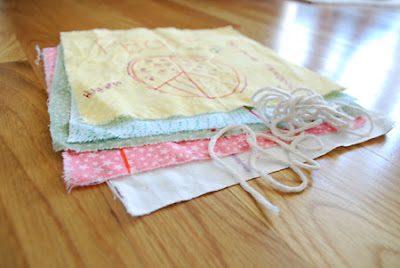
1) Peace flags are made by tearing rather than cutting the fabric. The fabric should be torn into squares of 9 x 9 inches or 12 x 12 inches. Small flags could be 6 x 6 inches
2) Take this opportunity to discuss your vision of peace for the world. Ask your kids what their hopes and dreams are...not only for themselves but for others. What a great way for them to think outside of themselves. To me, it is important to do this project in a calm and peaceful setting. If things get tense, I stop the project and wait until we are in a better frame of mind.
(3) Write or draw your wishes and blessings on the flags using magic markers or fabric paint. What I love about doing this with kids is the sincerity and simplicity of their flags. It doesn't have to be fancy or elaborate, just heartfelt and honest.
Be sure to leave a small margin at the top so you can fold the flag over twine.
(4) When you have finished your flags, secure them by folding the top edge of each flag over the twine, and glue, staple or sew the folded edge to the flag. You can hang them in the traditional order of blue, white, red, green and yellow. Since I sew, I chose to run a quick stitch through the flags to secure them.

Finally, find a wonderful place to hang them. Traditionally, they are hung outside so the wind can carry forth the blessings. You can also hang them inside as well. They are a great reminder of what's important in life.
Here are our flags flying in the wind!

To learn more about The Peace Flag Project, please visit their website
here.


 I would love to see the tops or dresses you make! Send me pictures!


