Showing posts with label daisy janie. Show all posts

Wednesday, August 17, 2011

Collaboration pillow w/ Daisy Janie in current Living Crafts magazine


Back in late January early February, I made a pillow woven with some fabulous Daisy Janie Shades of Grey fabric.  While I was excited to work with Jan, I was a bit nervous about how I was going to make this pillow.  Weaving seat belts pillows is one thing but cutting/sewing/weaving fabric (especially as beautiful as Daisy Janie's) is something completely different. 

That bit of unease was enough of a challenge for me so I put on my big girl pants and went to work.  Well, that pillow (and the photo I took) can be seen in the current Living Crafts magazine.  Proof that you just never know where a project, collaboration, challenge will take you.


Thanks, again, Jan for the opportunity to work with your beautiful fabric (still have some house shoes in the works).

Tuesday, September 14, 2010

Sewing Machine Presser Feet - Where to Start

This week's question comes from fabric designer Jan DiCintio, a.k.a. Daisy Janie. Before she began designing droolworthy organic fabrics like these:
she made close to 2000 handbags, many of them with her old Kenmore model 158.19141 sewing machine, and she asks:
Hi Candy! I've always been impressed by your artfully done free-motion machine embroidery - too cool! What type of presser foot do you use. if any? Have you used other presser feet, like a hemmer foot? I want to experiment more with what different feet can do but am intimidated by where to start!
Presser feet! They were invented to make our jobs easier...and there are so many of them out there!

Jan's referring to my Free Motion Quilting that I do, here's a video if you're interested in seeing me in action:


The foot that I use there is a spring loaded darning/embroidery/quilting foot and looks like this (I'm using a Juki TL-98Q in the video, but I also have a Bernina 1530, and she's where I spent the bulk of my time learning how to free motion quilt):

When you combine this type of foot with lowering the feed dogs, you are able to move the fabric around in any direction, all controlled by your hands.

This foot is often included with a sewing machine because long before people were free-motion quilting with their sewing machines, they were darning with them, and this foot was invented for that. (Darning...does anyone even know what that is anymore? Basically, adding thread and support to an area of clothing that is worn threadbare by stitching back & forth and side-to-side). However, your machine is so old that the foot may have gotten lost!

Anyway, I did a little googling to find out about your machine, and I did find a couple of places that sell a free motion quilting foot that looks like this:

Sew4Less (picture source too) and Keepsake Quilting

Another favorite foot of mine is one that helps with topstiching - which I know YOU love Jan! On my Bernina I use the blind hem foot and use that vertical piece to butt up to the edge of the fabric I'm topstitching and adjust the position of the needle so I can choose the distance away from the edge. The Juki doesn't have a moveable needle, so instead I have 3 (2 pictured below) compensating feet - the right side of the foot is deeper than the left, letting me butt the edge up to the deeper side and topstitch along without a care in the world!

These are the feet that I love, and make the decorative stitching I do possible. There are tons more feet, it really depends upon what you want to do with it. And you know Jan, googling about your machine reminded me that although we'd like to think that we can find out ANYTHING on the internet, sometimes that info is HARD to find!

Over the years I have had awesome experiences with my local sewing machine shops (NOT the one that's part of a big chain, the folks that sell and service sewing machines - people like Don Kauffman's Sewing Machines & Steve's Sewing, Vacuum and Quilting, both located close to you). You should be able to walk in, tell them what you want to do, and they should be able tell you what you need, and whether you already have it - or sell it to you. If you bring in a sample, they'll probably let you try out the foot in the store (when deciding to buy my Juki, I designed a tote bag with a gazillion layers to sew through and constructed the WHOLE THING in the the shop to test it out - how awesome is that?)

I'm a big fan of learning by doing, and the folks at a good sewing machine shop are trained to help, so I would definitely stop by sometime and chat!

OK, I hope this answers your question Jan, and for the rest of you reading, I hope this was useful! Make sure to stop by Jan's blog to see what she's up to - I can't wait to see her new line of fabric, the designs of which she just unveiled yesterday:

Don't forget to send in your questions! I think I'm gonna settle in answering a question every other week, during the school year things get a little hectic - but please, ask away! Oh, and I'm having a celebratory giveaway this week, pop over and enter if you'd like.

[Candy lives in California with her husband, 2 boys, and dog. Aside from being wife, mom, teacher, crafter, web guru and all around doer extraordinaire she manages her own business,Candied Fabrics. You can read her blog here.]

Tuesday, April 6, 2010

Reupholstering adds new life to old furniture

I'm itching to update some of my old upholstered furniture.  I do this every now and then just to change things up. Simply updating a piece of furniture with new fabric can give it a completely new life.  You can find very inexpensive furniture at local thrift stores and garage sales that can be easily updated.  If you have a staple gun, you're golden. 

I recently slip covered the cushions of a great mid century modern chair for my friend of mine, Diana Brennan.  The fabric is fantastic with its bold colors and floral motif. Here is the chair in the corner of her office.


I've reupholstered chairs, benches, and even made headboards (which are actually very easy).  Here are some of the projects I've done in the past, several of which need to be re-done again. 

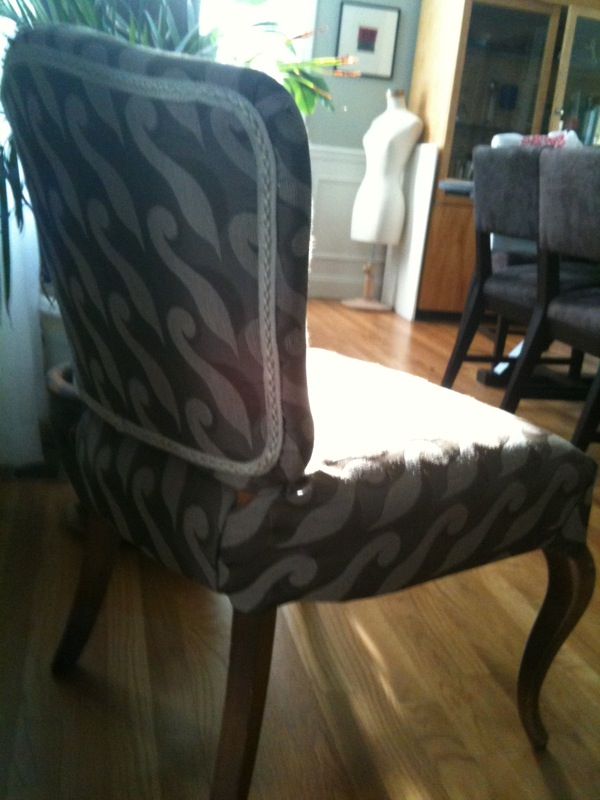
I've had this chair since college.  I used a glue gun to attach the trim and cover the staples on the back.


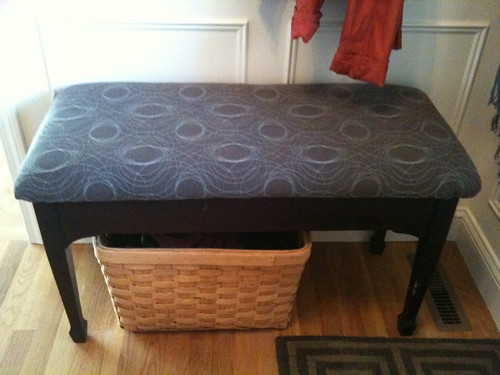
This piano bench was a $15 thrift store find from several years ago.  Although I like the fabric I used initially, it is time for a brigher pattern.  [BTW, a piano bench is great to use in a mudroom or near a door.  We throw hats and gloves in it.]  I just bought some fabric from Daisy Janie and plan to re-do it in the next week or so.  I'll take some pics and share with you how I do it. 


I made this headboard for a friend's son.  I just used plywood, foam, batting, and attached cover bottons.  The headboard simply hangs on the wall much like a picture frame.

I recovered this stool my friend found at a local thrift store.  I made the top removeable so she could throw it in the wash.

Here are some great reupholstered chairs I found on Flickr:


A $5 estate sale find reupholstered with Daisy Janie fabric by Jen Hewett

Josef Frank fabric, originally uploaded by Craft & Creativity.

Finished product, originally uploaded by pinkertons.


Have you ever reupholstered anything? 

Doesn't this inspire you to find a great little chair and re-do it? 

If you do, please share it with me!

Related Posts with Thumbnails